Sep 1, 2009 6
Custom GLSL/HLSL pixel shaders for Java2D, Swing & JavaFX
Introduction
Welcome to part 2 of our experiments on hardware accelerated effects in Java. Today’s weather forecast: 70% chance of… pixel shaders.
Remember last time, when I said I wouldn’t probably do custom effects and would wait for Sun to provide it to us ? Well…
I lied.
Actually, I changed my mind, but let’s not argue semantics here :]
We’ll see two things in this article. First, we’ll generalize what we did last time and get something usable from plain Java2D, and use that in our Swing support classes. And secondly, I’ll show you how to make your own custom effects/pixel shaders in GLSL & HLSL.
Before we start, a disclaimer: like a lot of the things I do around here, this is going to use some internal APIs, so 1) they might change in the future, 2) I might use them badly (as I think I did in the previous article, it should be cleaned up now hehehe) – 3) there are some things I don’t understand in the APIs, after all there’s so much I can do with undocumented bytecode and without the source really, 4) all this is possible thanks to an ugly hack I won’t bother explaining, because it’s not really interesting.
That being said, I did my best to hide the ugliness behind easy to use API. I can’t be sure this code will work in future releases of Decora, or if it would be doable to adapt it then, though. If that happens, let’s hope Sun provides an officially supported way for custom effects and pixel shaders (which could be as simple as giving access to decora’s compiler and JSL, as I said last time).
Java2D & Swing
There are now 3 ways to use decora effects: 2 for Java2D, and one for Swing with help from JXLayer (which, of course, uses the Java2D ones).
The first one is DecoraEffectRenderer and allows you to draw an Image with an effect applied, on a specific Graphics. This class delegates rendering to some decora utility methods I found not long ago (and might not have been present in decora when I initially wrote this experiment, last december), and renders manually when those can’t be used (“context hijacking”, which I use in the JXLayer support – ie when applying effects on non Java2D-managed images). It contains 3 or 4 drawImage methods (that mirror the ones in Graphics2D). The second one is DecoraEffectImageOp, which as the name suggests is a BufferedImageOp implementation. Those two classes should help you use decora almost like you use Graphics and software effects today in Java2D, so pretty familiar territory for you if you’re reading these lines. The last class is the JXLayer DecoraLayerEffect, from last time, but now just uses a DecoraEffectRenderer internally.
Custom effects / pixel shaders
And now on to the good stuff. Even if the basic concept was easy to code after I got the idea on how to do it, the longest part was coming up with a coherent API I wouldn’t mind using, making sure it worked with GLSL, HLSL, on windows and linux (both using java 6), and so on (unfortunately i couldn’t test on a Mac, I have hopes it will work there, but I have no idea – I think the closest i can get to the Mac environment is java 5 under linux, but decora/JavaFX only run on java 6 there, since they rely on the RSL).
I also want to note the work I did here needs signing in webstart, a requirement I have high hopes of removing when Decora/JavaFX 1.2.1 is released, because of a bug that was recently fixed there. Unsigned webstart is not really a hard requirement for me, but it might be for you. In any case, the method I use for hijacking shaders into decora works unsigned; some files will need to be moved around, but I think that’s basically it. We’ll see how it goes when I can test it, and see if i’m right.
As I said last time, decora has a number of backends because it runs on quite a diverse set of platforms/hardware/software/gpu drivers/etc. What I did here is basically a small subset of what the decora compiler does: only for the gpu backends, and requires manual coding. With JSL you’d code a single file describing your effect, and have the compiler generate all the support classes; here we’ll need to do “everything” manually, and I’ve succeeded in making this task pretty small: one java file, and two pixel shaders, for OpenGL & Direct3D – and of course one of those might be optional, depending on your target platform. For an effect called X, you’ll have in the same package X.java, X.glsl and X.obj (compiled from an HLSL file, using the fxc tool that comes with DirectX SDK)
Let’s see how to make a custom effect. We’ll stay at the global overview level, assuming you can read my code, samples and demos for down and dirty specifics if need be.
As JFXLayer has shown, we’ll need a class extending decora’s Effect. Here to create your custom effect, you’ll extend a helper class I did, called, you guessed it, CustomEffect. And it’ll basically look like this:
Custom effect structure
[sourcecode language=’java’]
public class BlingBling extends CustomEffect
{
// TODO: insert bling here
// —– Bling controlling —–
@Override
protected Class> getShaderControllerClass ()
{
return BlingBlingController.class;
}
public static final class BlingBlingController
extends Abstract/*Stuff we’ll talk about later*/ShaderController
{
public final void updateShader (BlingBling effect, Shader shader)
{
shader.setConstant (“bling”, effect.getBling());
}
}
}
[/sourcecode]
Hello less-readable-but-safer-because of/thanks to-generics code. Most of this will be generated by your IDE anyway.
The BlingBling java class is the effect implementation. You’ll create instances of this, pass them to DecoraEffectRenderer or DecoraLayerEffect, set parameters, variables and so on. The inner class is the shader controlling part, ie setting variables on the shader, whose values are coming from the BlingBling effect itself. Pretty clean and simple for something that’s quite complicated if you think about it really.
Shader controlling and the shader itself
The shader controlling is grouped by the number of samplers the shader uses: 0, 1 or 2 – because that’s the way decora does it. The shader controller will most of the time extend Abstract[NumberOfSamplers]ShaderController: AbstractZeroSamplerShaderController, AbstractOneSamplerShaderController, AbstractTwoSamplerShaderController. The whole hierarchy is more complex, there are other abstract classes and interfaces you can extend/implement, those are the ones that provide the most help, but you can read the code and figure this out yourself, it’s pretty simple.
Let’s start with what’s common between all of them, the shader structure itself. I won’t obviously explain anything about coding pixel shaders here, and only focus on what’s needed to use and create your own.
I’ll say that there’s more flexibility when using GLSL code – because they can be parsed, composed, and messed with at runtime, which is not easily doable with HLSL – and I’ve called this “prettify-ing” the shader. A “pretty” decora GLSL shader will look like this, a regular GLSL shader:
[sourcecode language=’java’]
// bling related variables and samplers
void main()
{
// bling computing using the mentioned variables and copious texture2D calls
gl_FragColor = bling;
}
[/sourcecode]
While a real decora GLSL shader actually looks like this:
[sourcecode language=’java’]
uniform float jsl_pixCoordYOffset;
vec2 pixcoord = vec2 (gl_FragCoord.x, jsl_pixCoordYOffset-gl_FragCoord.y);
uniform vec2 jsl_posValueYFlip;
vec4 jsl_sample (sampler2D img, vec2 pos)
{
pos.y = (jsl_posValueYFlip.x – pos.y) * jsl_posValueYFlip.y;
return texture2D (img, pos);
}
// bling related variables and samplers
void main()
{
// bling computing using the mentioned variables and copious jsl_sample calls
gl_FragColor = bling;
}
[/sourcecode]
As you can see there’s a little more boilerplate, and the helper classes basically turn the pretty GLSL shaders into the regular ones. Prettifiying GLSL shaders is optional (but is set to true by default), and also comes with a perk, you don’t have to tell the shader controller the names of the samplers (unless you want to or need to control the IDs), something you have to do with regular decora GLSL & HLSL shaders.
The HLSL shader will look like this skeleton:
[sourcecode language=’java’]
// bling related variables and samplers
void main (/* TEXCOORD0 UVs for each sampler */, in float2 pixcoord : VPOS,
inout float4 color : COLOR0)
{
// bling computing using the mentioned variables
color = bling;
}
[/sourcecode]
This is how you’d compile that last HLSL shader to an obj (you could use another file extension if you wanted to, like the more common .ps – but decora uses .obj and that would be mandatory for sandboxed access, so I’ve let it be the default): fxc /nologo /T ps_3_0 BlingBling.hlsl /Fo BlingBling.obj
Now you know why decora (and thus JavaFX) requires a graphics card that supports at least the Shader Model 3.
*-sampler shaders
Let’s look at the different types of supported shaders & shader controllers, what they are useful for, and talk about the included samples, which will show you the exact pixel shader structure you need to follow here.
One-sampler shaders are probably the most common ones, as they represent the kind of effects used in image processing. I provided a sample effect, a basic clone of the SepiaTone decora effect, imaginatively called SepiaToneClone. [Abstract]OneSamplerShaderController offers a way to get the sampler’s name, and whether it is using bilinear or nearest neighbor filtering. To give you an idea, in Decora, the blur, brightpass, and color adjustment effects are all effects using one sampler effects. These shaders would be useful if you wanted to implement some image processing effects for instance, such as the ones you find in Jerry Huxtable’s jhlabs filter library.
Two-sampler shaders, most of the time either mix the two source images, or use one as parameters to apply an effect to the other input image. [Abstract]TwoSamplerShaderController also provides a way to get the samplers’ name, and the filtering to use. Examples of these in Decora are the various Photoshop Blend modes and displacement map effects. I provided a sample effect for that too, which is a clone of the multiply blend mode. These shaders would be useful if you wanted to implement transitions effects for instance, such as the ones you can find in Jeremy Wood’s transitions/transitions2d library.
And lastly, zero-sampler shaders. These, I think, would be the kind of shaders you’d use for procedural textures, like the ubiquitous checkerboard or brick patterns, or the Mandelbrot/Julia fractals for instance, up to the more modern procedural shaders you see in some farbrausch productions (like .kkrieger/.theprodukkt), the game Spore, or the Substance Air tech from my compatriots Allegorithmic. In practice, however, and the reason why I just said “I think” is because you’d probably need UVs for anything worth looking at, and I’m not sure if that’s provided in decora here, since there are no zero-sampler effects in the whole library. That’s why I didn’t provide any sample here, and I started doing my own procedural shaders using one-samplers. So your mileage may vary here.
The java code for the effects, shader controllers & glsl and hlsl shaders (provided in the zip at the end of this article) will probably need to be looked at in more detail to really be able to make a custom effect, but the basic principles have all been described here, and you should be good to go.
Animayshion, man
While the pixel shader support is blazing fast for static images/UIs, be sure to test your target platforms thoroughly if you’re intending to animate those effects, there’s a lot of image data moving from the cpu to the gpu and back here, complicated effects become slow on big images or live UIs because of that. With great power comes great responsiblity, as the great philosopher once said – or maybe it was spiderman, i’m not sure.
I think/hope that the Prism renderer, coming in the next JavaFX release, will solve that. The public info on this is that it will add image caches for any node in the scenegraph: those being on the gpu, animations and pixel shaders should be faster. I’m not sure however that it will allow custom shaders, I doubt it to be honest, and this is part of the reason I changed my mind and coded it myself, however bad and inefficient my code would be – taking into consideration the conditions under which I’m doing this. Plus, Flash (in a sense) and Silverlight already offer this, and I find this lacking in the Java world – Java2D/Swing, not JOGL obviously.
JavaFX support
As for JavaFX support, I’ll start with another disclaimer: I don’t do JavaFX script at all, so take this code with a pinch of salt; if anyone wants to improve it, or correct it because it’s most likely bad, let me know (not to mention I mostly succeeded in crashing the openjfx compiler with those 10 lines). It works like this, you do what’s needed for general java support, and also create a JavaFX class extending my javafx.scene.effect.custom.CustomEffect, to specify and control the custom java effect. This will allow you to use your JavaFX effect like the regular ones.
An example JavaFX effect using the SepiaToneClone sample effect:
[sourcecode language=’java’]
package javafx.scene.effect.custom.sepia;
import javafx.scene.effect.custom.CustomEffect;
public class SepiaToneClone extends CustomEffect
{
public var level : Float = 1.0 on replace
{
delegate().setLevel (level);
}
protected override function createDecoraEffect() : com.sun.scenario.effect.Effect
{
return new org.hybird.decora.effect.sepia.SepiaToneClone();
}
function delegate() : org.hybird.decora.effect.sepia.SepiaToneClone
{
return decoraEffect as org.hybird.decora.effect.sepia.SepiaToneClone;
}
}
[/sourcecode]
Crappy demos
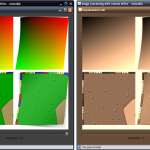
I can’t write an article without demos, you know that by now. Unfortunately, they won’t be particularly impressive today, since the point of the article is to show how *you* could do pixel shaders. The sample effects I coded, being mostly clones of existing decora effects, won’t be really new obviously. In any case, here they are, the first one uses the decora renderer to apply a clone sepia color adjustment on a screenshot of the displacement map test demo I talked about on twitter.
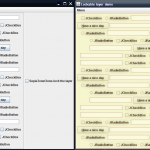
The second uses the JFXLayer decora effect and is once again a simplified version of JXLayer’s LockableDemo. Here, a gaussian blur & the clone sepia color adjustment are applied on Swing UI when locking the panel, using the blend multiply clone.
And the last one, is a JavaFX text label over a blue rectangle to which the sepia effect is applied. Clicking will lower threshold. Seriously impressive stuff, i expect George Lucas to call me for help on the next Star Wars, based purely on the aesthetic of this last one. True story.
(Famous) Last words + Download
Of course I wanted to provide more polished demos, with a GLSL editor to play with, for instance, but this article is already getting too long, and I don’t have any more time to make it shorter, or longer – I want to finish it quickly to keep my incredible one-post-a-month average.
Some time in the future we’ll probably see how to make a custom effect that’s actually useful, most likely from one of the “These would be useful if” ones I mentioned here, a transition for example. *Those* would be/will be worth demoing.
You can find the whole project here, with all the support classes, samples, shaders, etc (the whole shebang is under BSD as usual).
Till next time, take care. By the way, you should follow me on twitter here.
PS: this is why I only post once a month, I think I actually aged while writing this 2500-word long article :]
